Drop Heater Change In Mould: Changing drop heater is a very difficult process. For this you first have to know about the things present inside the mould. You have to first make sure which heater's connectivity is not coming. You also have to ensure that the heater is the manifold or the drop.
1. The first is to open the top plate of the sequence valves.
2. You have to open the pneumatric system of the sequins carefully. we are opening 7 sequence valves mould. Pneumatric sequence valves works on air and need to 6 baar pressure for work. It is connected with a 16 pin connector. With its help, we can operate them. After opening it has oring under it which should be kept with great care.
3. When opening the mode, we should know what are the plates inside the mould. The number 1 plate is the top plate as shown in the figure. The number 2 plate is the hot runner plate. And the number 3 plate is the cavity plate.
4. If you are working in the room then you identify the bolt used in the mould. Most long bolts move from two plates to cavity. In this mold, the B1 top plate moves towards the cavity and B2 from top plate to hot runner plate. Open all bolts and don't remove plates because we need HRTC.
5. In the HRTC mode, the heater is heated and pinged the plastic. The mold in which the heater is to be changed is of 12 zones, so we have also taken HRTC for 12 zones. We need 300°C temperature to extract the sequence valves. We are using HRTC 8 for heatting. Its best and constent means its not set by production team. Be sure that your HRTC setting ok or not, because inside two function working, J type thermocouple and K type thermocouple.
6. After heating, we will remove the sequence valve by alternating it. This is necessary because it does not mix with each other and due to the drop up and down many times, the height of the sequence is low and high. Most sequence valves do not come out, so look at their seals, etc. well, if there is any cut and damage. We use pular to remove sequence valves. If you have removed the sequence valves, clean them in a hot state. Because emery paper is not applied on it. It has a granding on it and can be easily cleaned with a cloth.
7. Now the top plate is lifted and placed in another place. So that further work can be done. The top plate should be lifted very carefully as it has a higher chance of damage to the sprue heater. If possible, let the long bolts remain in the plate so that the plate can be lifted from their reference.
8. As you can see in the picture, there is complete leakage inside the mould. You can use a hot air gun to remove it. To remove it, you should use brass road. Do not use iron road. It is necessary to wear gloves before working in manifolds. Remove the accumulated plastic slowly so that there is no wire damage and no thermocouple damage.
9. After removing the plastic slowly, loosen its bolts and try to remove it. In most manifolds, a six-allen key(hex key) is used in MM.
10. It is detected by checking with a multimeter which heater is faulty and not working. After completely removing the plastic, the drop manifold bolts are also loosened and opened.
11. The housing of the drop and the dope are cleaned thoroughly after opening. The heater was checked but was not indicating connectivity.
12. Another new hetter has been installed inside the drop which was working well and the connectivity has already been checked.
13. The thermocouple of the drop is also checked but it is working well so it was not replaced.
14. After this the thermocouple and heater have also been checked with Body Earth. So that it can be ascertained that it is not touching the bodyshort with the body.
15. The drop is then inserted into the manifold and bolted to the bolt.
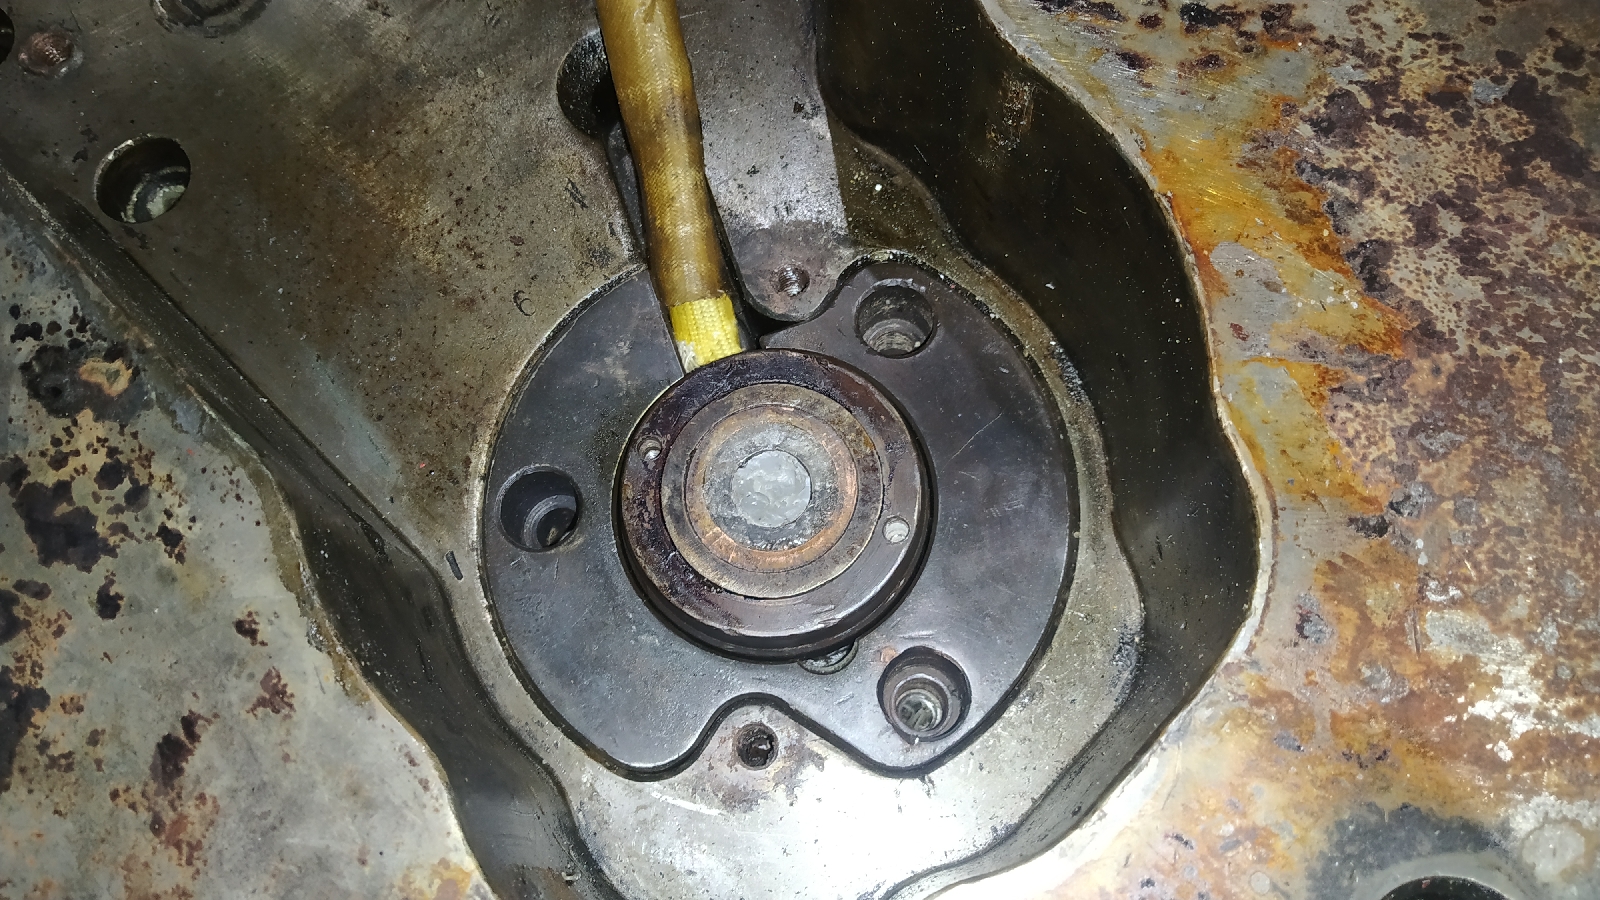
16. When you are closing the mold, keep in mind whether you have changed the curing or not. This ring is made of copper. After inserting this ring, the manifold is heated so that it spreads under pressure and maintains the gap in the middle. The ring's diameter is according to recording mode and its thickness and diameter are changed accordingly.
17. After this the butt area of the manifold is cleaned. If there is any plastic left then it creates problems in the future. So something like this is cleaned. And finally 2000 amrey paper was also applied on top of it.
18. Before turning off the mode, make sure that the pressure pad on it is not correct and is full. Lack of pressure buttons also increases the chances of recurring to the material manifold.
19. It is also necessary to have pressure ped of the sequence valve so that it does not allow gap between drop and manifold. If the material is continuously coming out from the same manifold, then the material leakage can be prevented by putting a SIM on it. Putting a SIM is a bit of a juggling job, but to prevent the consumption of time to become a new one, it has to be done, although this does not affect the manifold, as the new pressure button does the same.
20. Before turning the mode off, wiring is done and thermocouples are also checked. You have to make sure which thermocouples are installed inside your machine and mold. There are two types of J and K.
21. When turning the mode off, be careful when you turn the mode off. No wires are buried between the plates.
22. After tying the mode plate to the bolt, it again checks the connectivity to know if there is any wire pressed.
** The heaters of the manifold and the size, length, watt of the drop heaters are noted so that they can be changed when further problems occur.


No comments:
Post a Comment